TOC
CH1: Compass Basics
CH2: School Management
CH3: Student Management
CH4: Creating Stops
CH5: Vehicle Management
CH6: Generating Runs
As it is explained in the introductory tutorial Get to Know Compass, Stops are those places where Students will be picked up or dropped off on their way to or back from school. Users need to plan Stops carefully before they can generate Runs and Routes, since they will determine the course of these.
Compass contemplates two types of residential bus Stops (those different from Schools), depending on the number of Students assigned to them:
- There are Stops that service only one Student. Sometimes these are created next to the Student’s residence and they are known as Curb-To-Curb Stops.
- There are also Group Stops, which can service several Students that live nearby and are able to walk to them.
Stop Management Tool
The Stop Management tool can be accessed by clicking on the Stops tab. This will display the Stops Management menu, where many different filters are available to narrow down the search of existing Stops. Once the preferred filters have been selected, clicking on the Find button located underneath will return a list of the matching Stops. This list shows the Stop ID followed by a Search button that can be clicked to disclose the selected Stop on the map together with its Bus Stop location window.
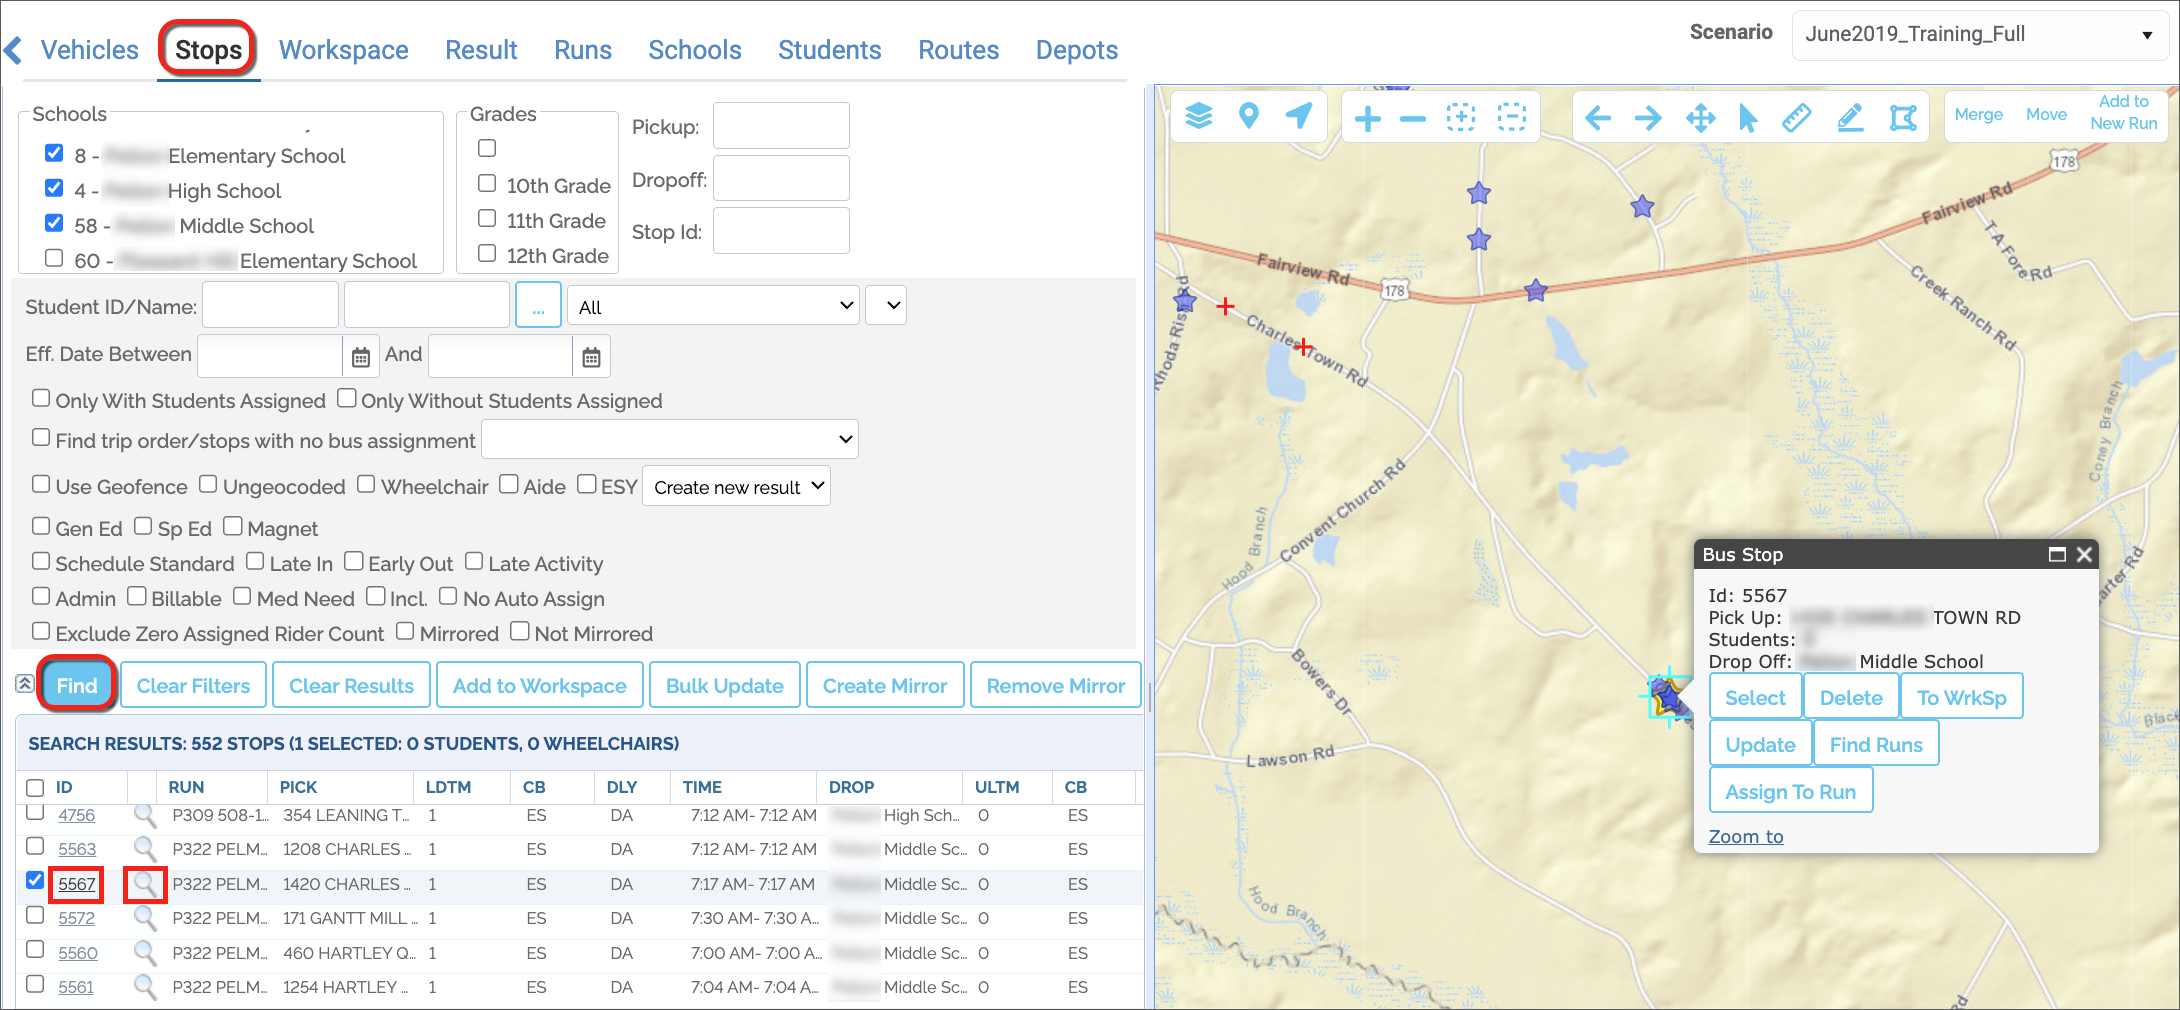
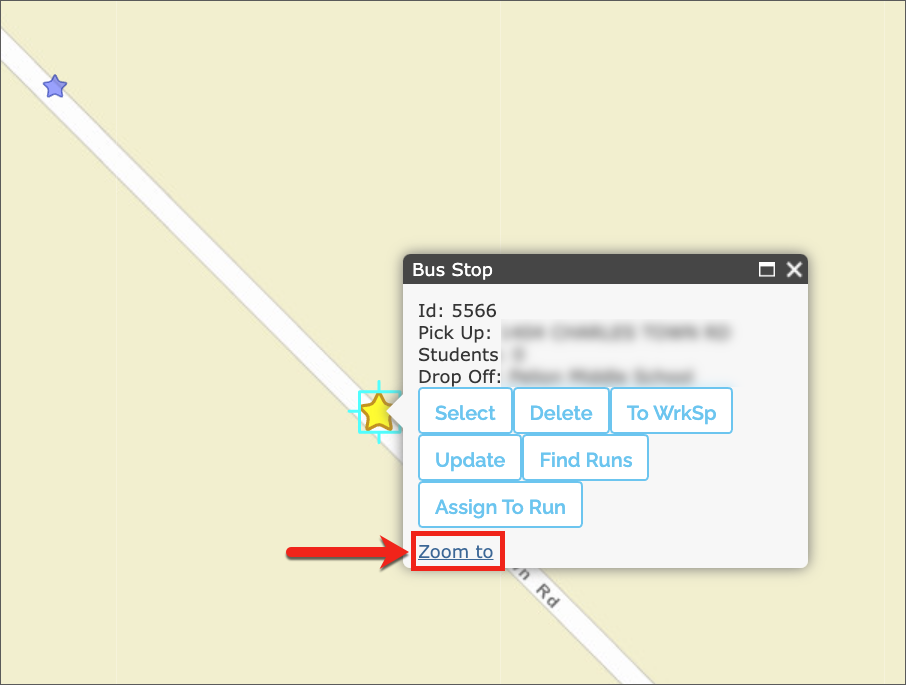
The Bus Stop location window shows Stop ID, Pick Up and Drop Off locations linked to the Stop, and several buttons users may use to:
- Select the Stop
- Delete the Stop
- Add the Stop to the Workspace
- Update the Stop’s information
- Find Runs
- Assign Runs
A quick Zoom To button is also available to get a closer view of the location on the map.
A Closer Look at Search Filters
The first two sets of filters are Schools and Grades (a) and they are displayed within separate sections.
Next to them, three new text boxes allow users to filter by Pick up, Drop off or Stop ID (b).
Pick up and Drop off allow the input of the address where this actions take place, or even just the street names at such locations. This also applies to intersections.
Located underneath, Student ID or Name and Available Schools (c) also provide filtering options.

More alternatives displayed below (d) include:
- Stops with/without Students assigned.
- Geofenced Stops (located within an area previously delimited by a polygon).
- Ungeocoded Stops. To know more about this topic, read the Geocoding section.
- Stops with aides assigned.
- Stops for General Education, Special Education or Magnet programs.
- Different types of schedule.
- Administrative, Billable and Medical Needs classification.
Other Stop-Related Buttons
In addition to Find and Clear, several other buttons are displayed under the search filters area.
These buttons include:
- Add to Workspace: Stops can be added to the Workspace when they are going to be used to generate a Run.
- Bulk Update: Used to apply an action to a set of selected Stops.
- Create and Remove Mirror: Mirroring Stops is the process of turning AM Stops into PM Stops to generate Reverse Runs.
- New: Users can always create New Stops by clicking this button.
- Delete: Selected Stops can be deleted by clicking on this button.
- Groups: Used to group Stops together under specific names.
- Symbols: Used to create and assign symbols.

Stop Tabs
Remember that after a Stop search is done, a table showing a list of the matching Stops is displayed under the filter sections.
If you click on any Stop ID, a new window containing the information related to that specific Stop will appear. This information is distributed under different tabs.
The first two tabs are called Pick Up and Drop Off. It is fundamental to understand that every Stop must be linked to a Pick Up location and a Drop Off location when it is created, since every Student picked up at a particular Stop is necessarily dropped off at another.
Generally, one of these two locations will be the Student’s residence (or a location close to it) and the other one will be the School. Then, if an existing Stop shows a specific address as a Pick Up location, the Drop Off location will generally be a School and vice versa.
Pick Up
Stop Address or School can be selected at the top of the dialog. Related fields display to allow the input of relevant information.
The lower half of this menu also allows users to:
- Input Pick Up time window, Assigned and Actual number of Riders, number of Wheel Chairs, Safe Vests and Seat Belts, and Load Time in minutes.
- Select Curb location. Remember this drop-down menu specifies if U-Turns are allowed at this Stop and which side of the street the vehicle will be approaching from.
- Select Delay type. The Soft/Hard Time window drop-down menu is used to indicate if the scheduled time for the bus to reach the Stop is flexible or not. For example, Hard Time Window must be necessarily assigned to Schools because the arrival of the bus is determined by the Bell Time.
- Enter Maximum Ride Time in minutes.
- Select Specialties.
- Add Notes as needed.

Drop Off
Stop Address or School can be selected at the top of the dialog. Then, related fields display to allow the input of relevant information.
The lower half of this dialog also allows users to:
- Enter Drop Off time window and Unload Time in minutes.
- Select Curb location. Remember this drop-down menu specifies if U-Turns are allowed at this Stop and which side of the street the vehicle will be approaching from.
- Select Delay type. Remember that the Soft/Hard Time window drop-down menu is used to indicate if the scheduled time for the bus to reach the Stop is flexible or not.
- Add Notes as needed.

Stop Students Tab
The Stop Students tab displays a list of the Students that have been assigned to that Stop.
Each row shows Student ID, full Name, Address, School and Stop Effective Date.
Students can be selected and Removed whenever it is necessary.
In order to avoid mistakes, notice that Stop ID and Student ID are different.

NOTE: Stop ID vs Student ID
In order to avoid mistakes, be aware that Stop ID and Student ID are different.
Find Students Tab
This allows the search of Students by ID, Last Name, First Name, Schools, Grade and Walk Distance.
The resulting Students can be listed in the Student Search Result table and/or disclosed on the Map as preferred.
Then, any matching Student can be selected and added to the Stop by clicking on the Add to Stop button.
Effective and End dates can also be specified.
