TOC
CH1: Compass Basics
CH2: School Management
CH3: Student Management
CH4: Creating Stops
CH5: Vehicle Management
CH6: Generating Runs
As you already know, the Students Management dialog displayed in Compass under the Student tab allows you to find, view and edit Students’ information, assign Stops, etc.
With this tool, users also have the option to create new Student records and add them to the existing database.
To add a New Student:
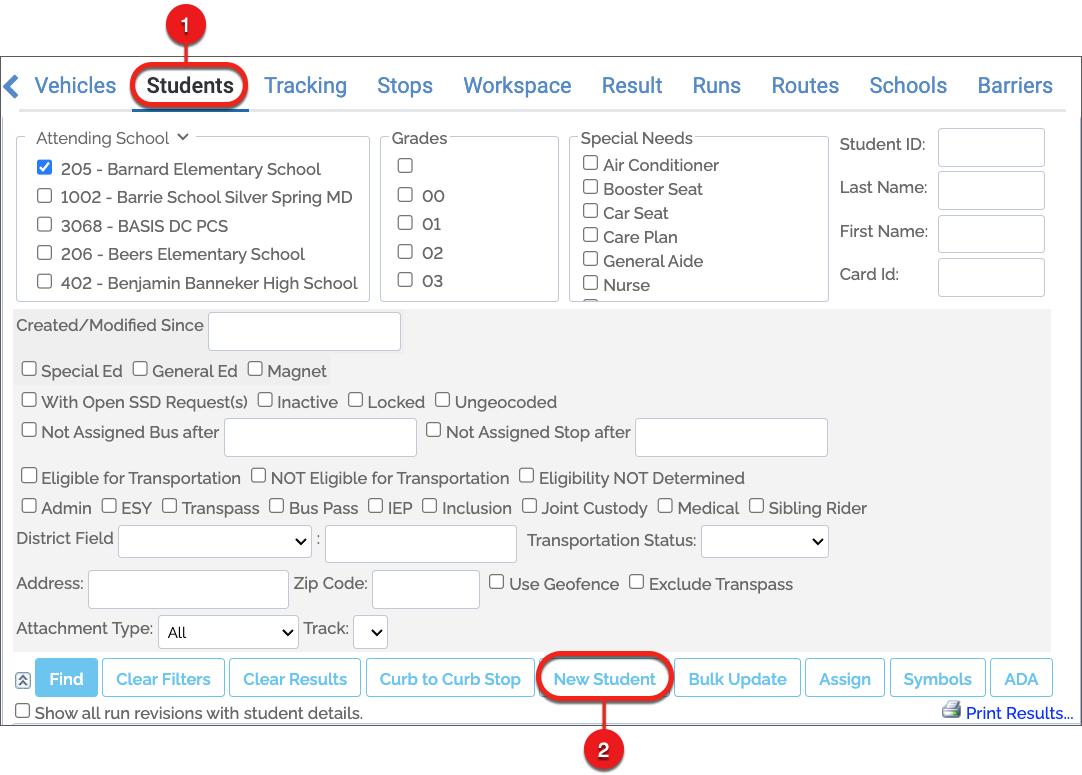
1. Click the Students label located in the top toolbar. The Students dialog appears.
2. Click New Student above the search results table to have the New Student window displayed.
Once the Student dialog is displayed, the upper right section of the top toolbar allows you to select Locked or Inactive status if necessary. Then:
- Enter personal and administrative data in the first section. You will find several drop-down menus that allow you to select Attending School as well as Zone School, Enrolled School and Summer School.
- Enter the Student’s Program information if needed.
- Select Special Needs if required.
(continue below)

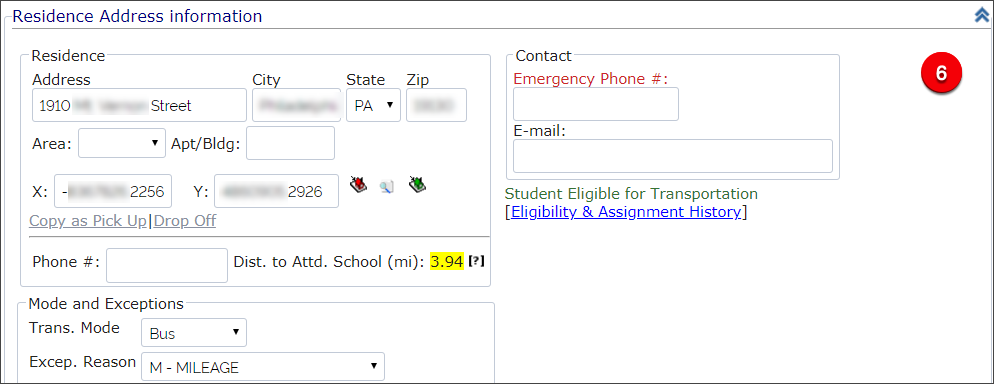
- Expand the Residence Address Information dialog by clicking the expand button on the right (double arrow) and input address-related information including complete Address, City, State, Zip, Coordinates and Phone, and add Emergency Phone and E-mail. If needed, use the Coordinates Tool to disclose the Student’s Residence coordinates (Geocoding). To learn more about this tool, read the Geocoding section in School Management. If necessary, select the Transportation Modes and Exception Reasons from the corresponding drop-down menus.
TIP: Address info as Pick Up/Drop Off
After you complete the Student’s Residence information, you have the option to copy such data as Pick Up or Drop Off information as well. This will save you time when entering Transportation data.
To copy data as Pick Up or Drop Off:
- Click Copy as Pick Up or Drop Off below the coordinates tool as preferred.
- Once copied, you will find the same data within the Transportation window. To review, find the Transportation tab on top of the New Student window and click on it.
You can also check the Distance to Attending School by clicking on the [?] button in the bottom right corner of the Residence section of the dialog.
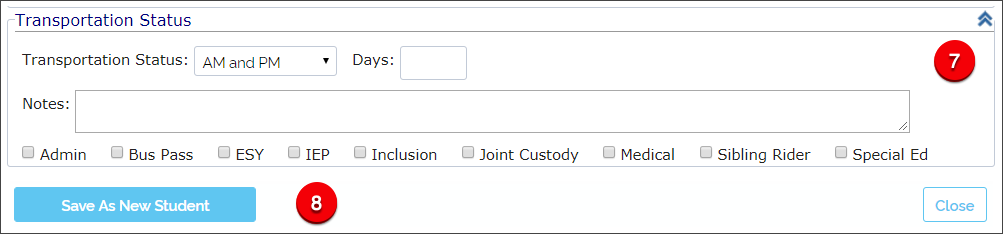
- Extend and select Transportation Status, add Notes and select the optional categories if needed.
- At the bottom of the dialog, click Save As New Student to save the Student’s Record.
The New Student Record dialog allows users to input a wide range of information, but not all the fields are required to create a New Student Record. If you try to save your data as a New Student but the information provided is not enough, the system will prompt you to fill in the necessary fields.
Adding District Fields
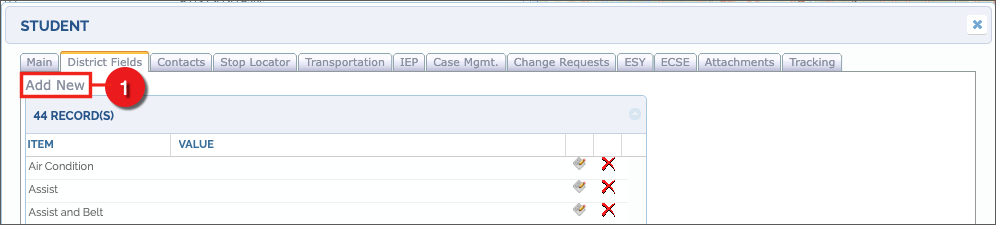
Once you have added the New Student, you can move on to District Fields by clicking the District Fields tab next to the Main tab.
- Then, click Add New if you want to create a New District Field for the Student. A Custom Attribute Details window appears.
- Enter a descriptive name for the Item.
- Enter the appropriate Value.
- Click Add.
- Finally, click Save As New Student.
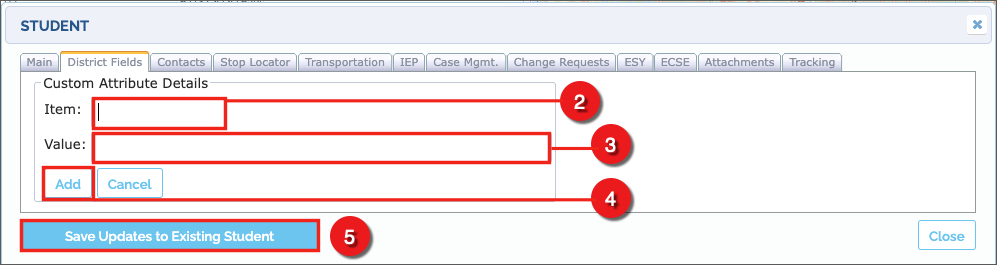
Once you do this, the New District Field record will appear in the District Fields list.

Adding Contacts
Move on to Contacts by clicking the Contacts tab on the right of the Main tab if you want to Add Contacts to the New Student’s record. When the Contacts window appears, click the Add New Contact and/or Add New Address labels to disclose the corresponding information.

Within the Contact Details section:
- Enter Person and Relationship with the Student.
- Enter the Address, Phone, E-mail and Employer if applicable.
- Select Emergency Contact if appropriate and enter any Notes as needed.
- Click the Add Contact button. The Contact Details dialog will close and you will see the new Contacts added in the records table.
Within the Add Address section:
- Enter Address, City, State and ZIP code.
- Use the Coordinates Tool to disclose the address coordinates ([X] and [Y]). To learn more about this tool, read the Geocoding section within the School Management chapter.
- Select an Address Type from the corresponding drop-down menu and enter any necessary Notes.
- Click Add.
- Click Save As New Student. The Address window will close and you will see the new Address added in the records table.
