TOC
CH1: Compass Basics
CH2: School Management
CH3: Student Management
CH4: Creating Stops
CH5: Vehicle Management
CH6: Generating Runs
Viewing a Run
Sometimes users may want to check a previously generated Run. If you want to View an existing Run:
- Click the Runs tab in the toolbar.
- If you know it, enter the Run#/Name in its text box, on the upper right group of search filters. You can always use the other filters, such as Schools or Depots, to search for the Run.
- Click Find. The Run will be displayed in the Runs Search Results table below.
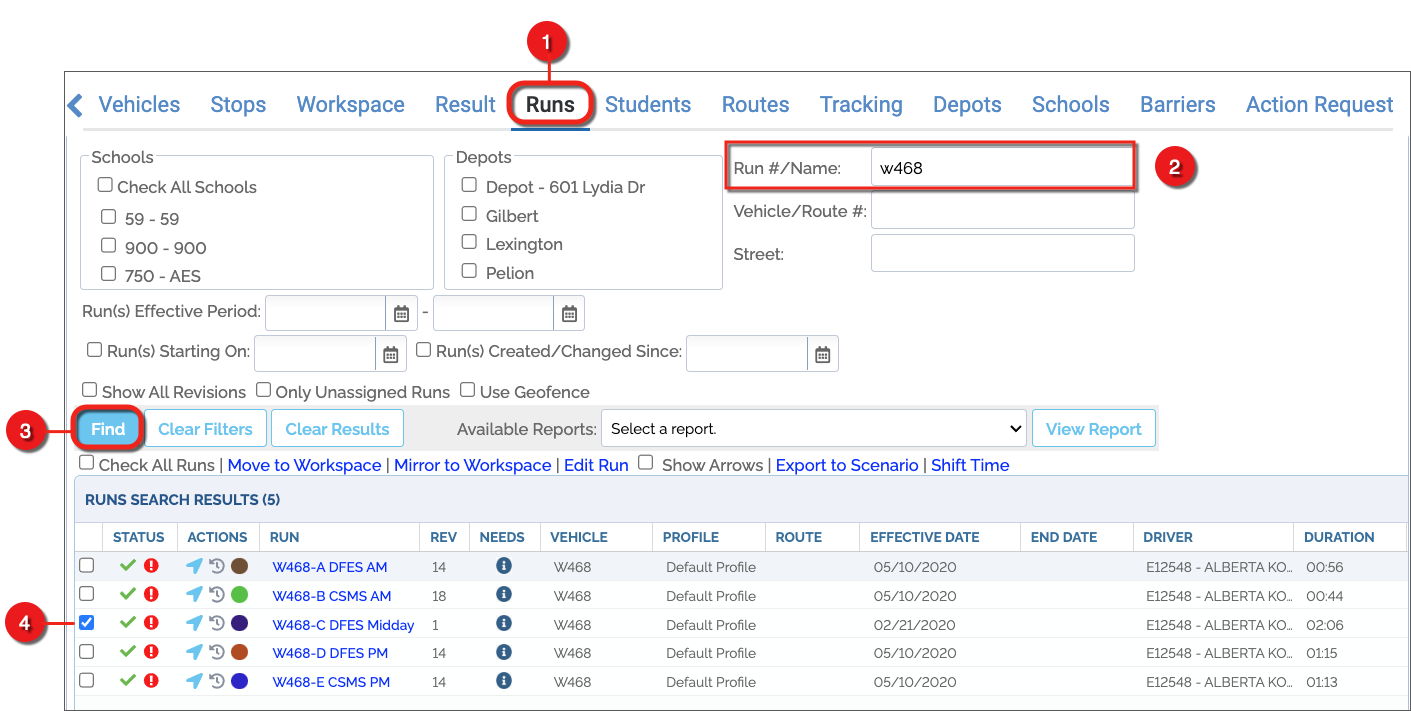
- Select its corresponding box (see previous image). The Run will also be disclosed on the Map.
Accessing Run Details
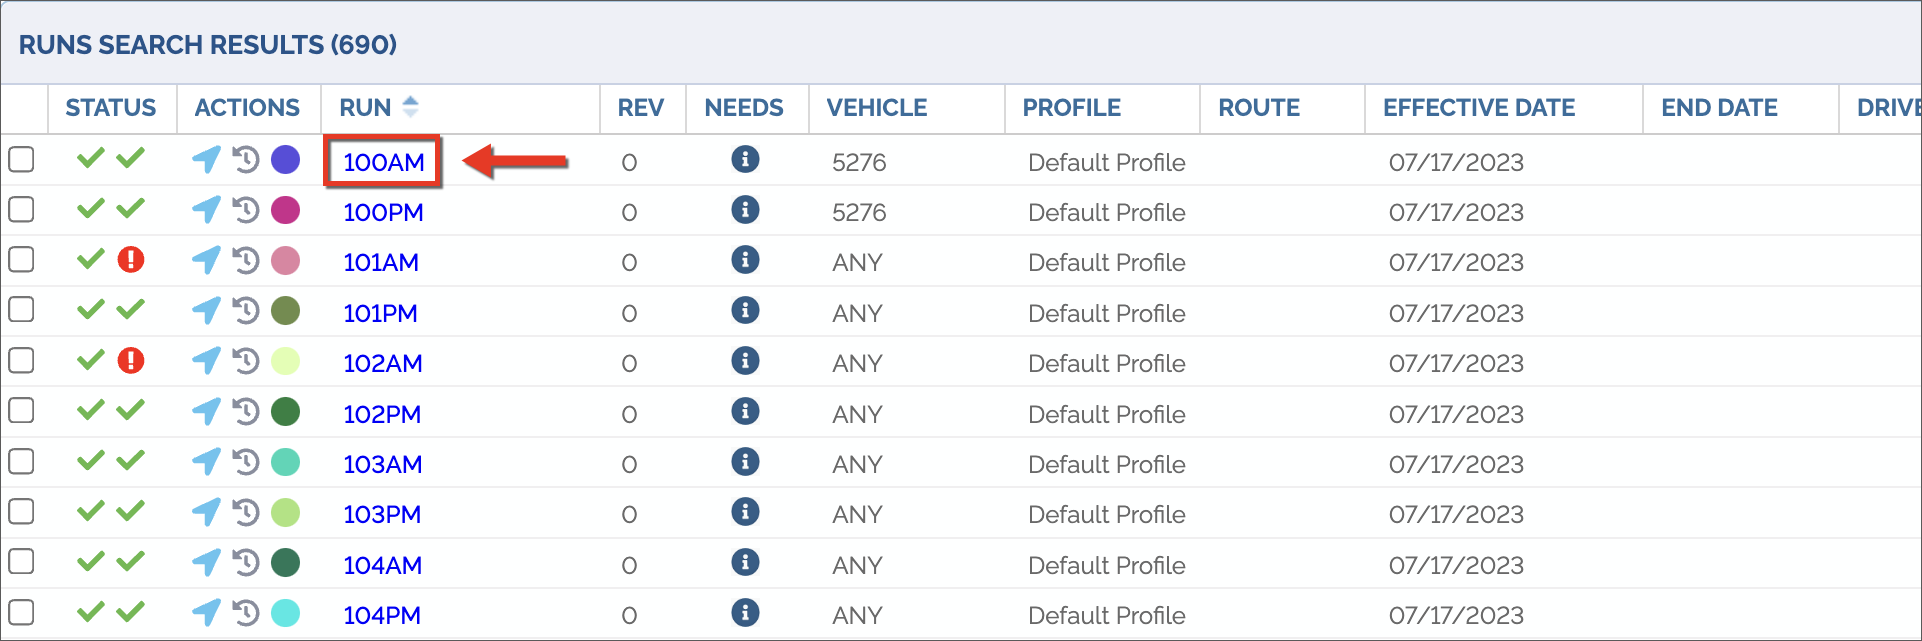
From the Run Search Results table you can access the Run Details dialog. To do so, click the Run ID in the Run column as shown in the image.
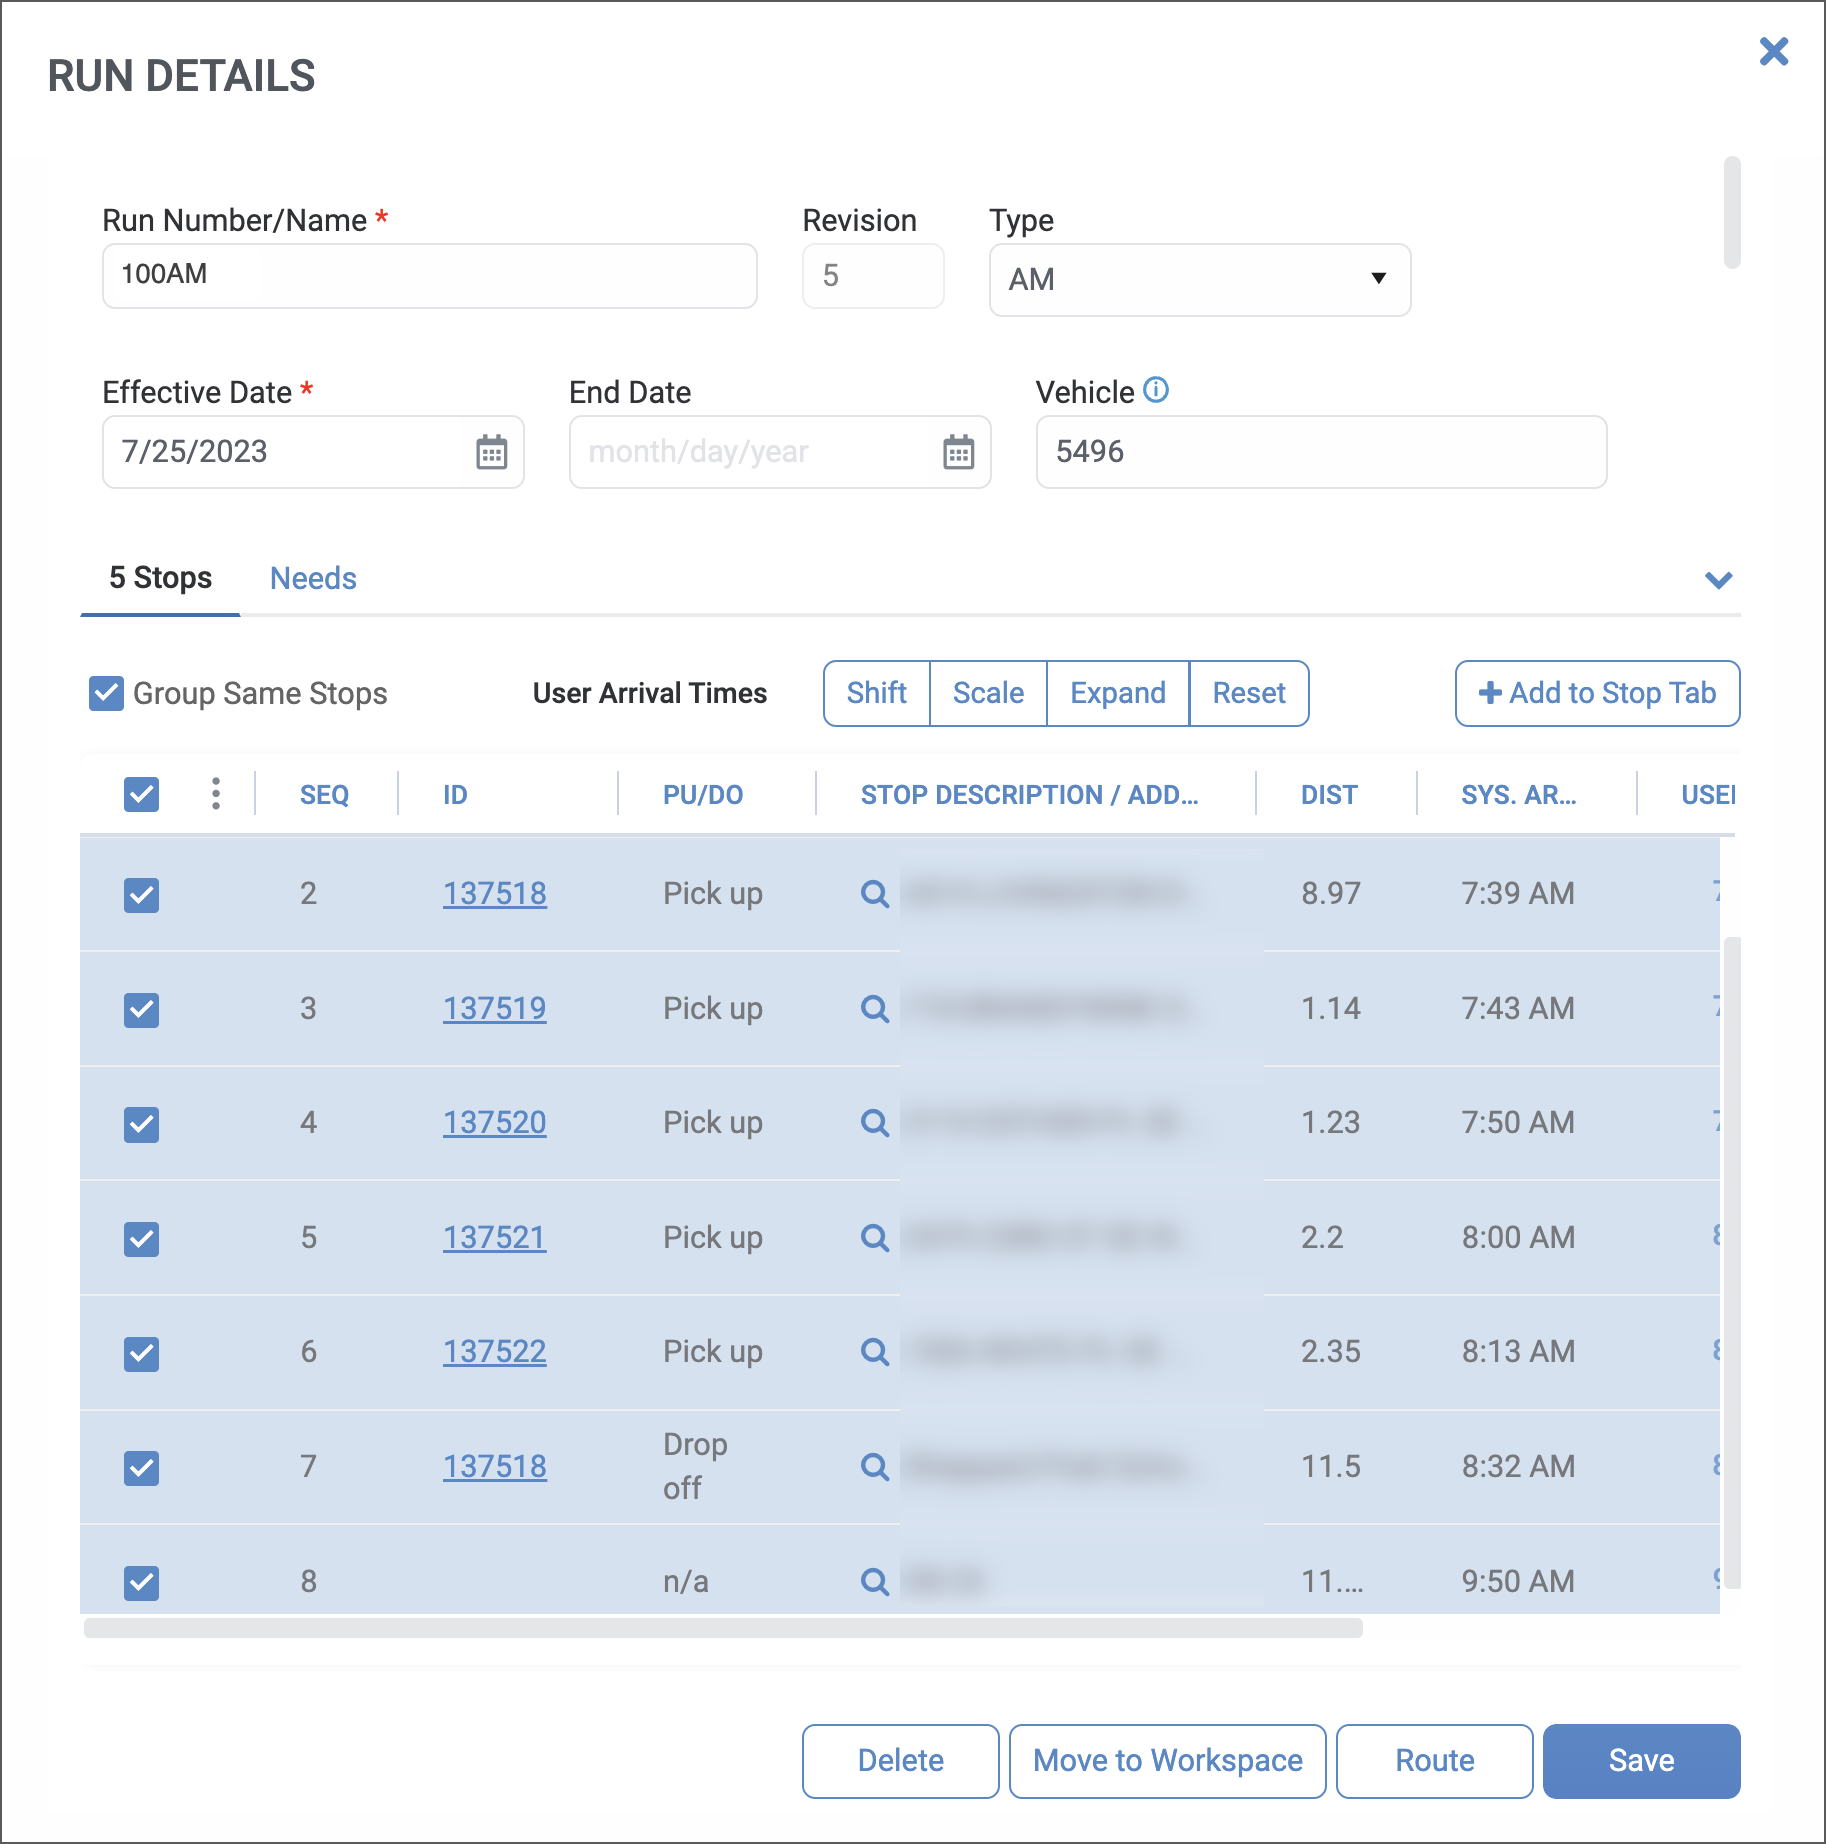
The Run Details dialog holds an upper section presenting the Run Number, Revision, Type of run (Activity, AM/PM, Special Ed…), Effective and End Date, and assigned Vehicle. All these fields can be edited by imputing the appropriate information in the corresponding text boxes, or by selecting the values from the provided drop-down menus and calendars.
Below, two different tables provide information on the Stops assigned to that run and the Needs that the vehicles servicing that run need to be equipped for. Let’s take a look at each table:
Run Details – Stops
This table displays all the stops in the run together with details on;
- Sequence
- ID
- Expected event type, i.e., Pickup or Drop-off
- Stop Description
- Distance from previous stop
- System Arrival Time
- User Arrival Time
- Load/Unload estimated time.
For user convenience, stops that occur more than once, and consequently are repeated in the list, can be grouped with the Group Same Stops button located in the upper left corner or the table.
There are User Arrival Times dedicated buttons that allow you to specifically edit this parameter.
In addition, stops in the list can be selected and deleted or moved to the workspace for further work with the corresponding buttons located below the table.
Run Details – Needs
This table displays all the features required for the transportation of the students assigned to that run, which are grouped in:
- Vehicle Capacity
- Vehicle Equipment
- Other Needs

Editing the Run Sequence
Occasionally, users may need to change the sequence of their Runs for various reasons. For example, Students with special needs might require more time to get ready for pickup, and the user could decide to change the sequence number of the Stops in that Run to better suit those Students’ needs.
You may be in two different situations when you want to change the sequence of a Run. Let’s see how to proceed in each case.
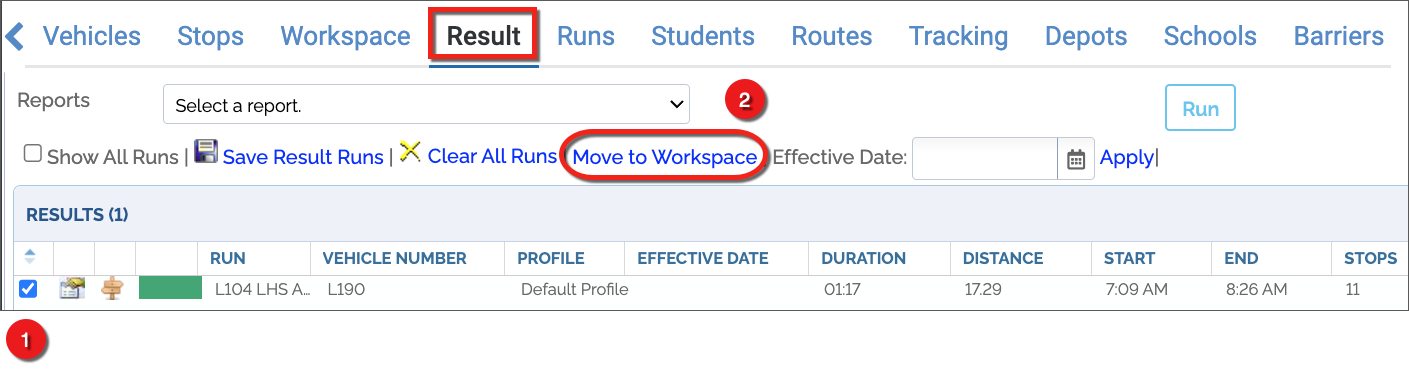
A. If the system has just solved the Run and you are still in the Results menu
- Select the Run by clicking its corresponding box.
- Click Move to Workspace to move the Run to the Workspace.
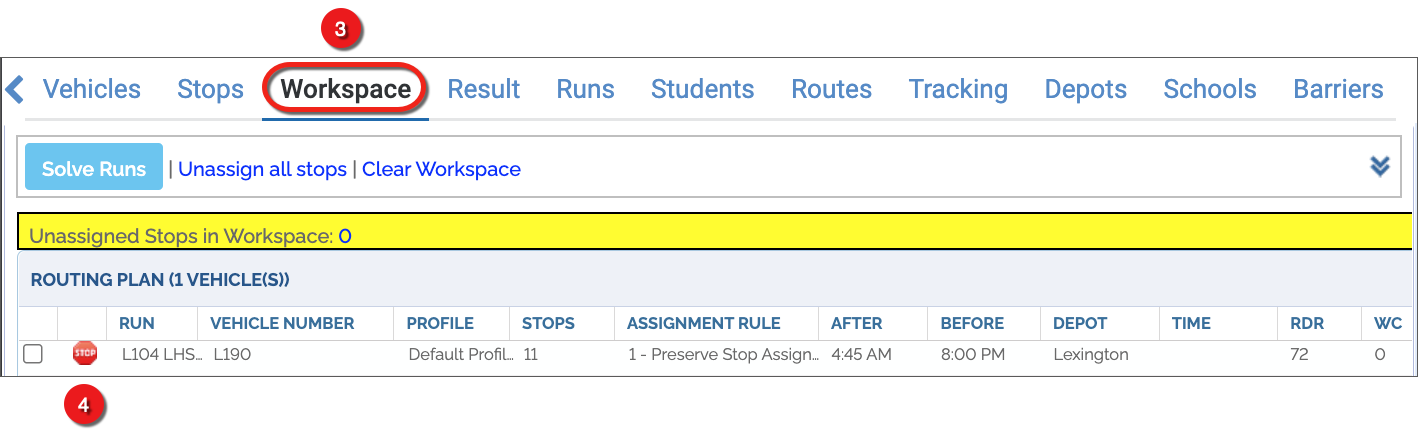
- Proceed to the Workspace by clicking the Workspace tab.
- Click on the Stop List icon on the left. The Stops List window appears.
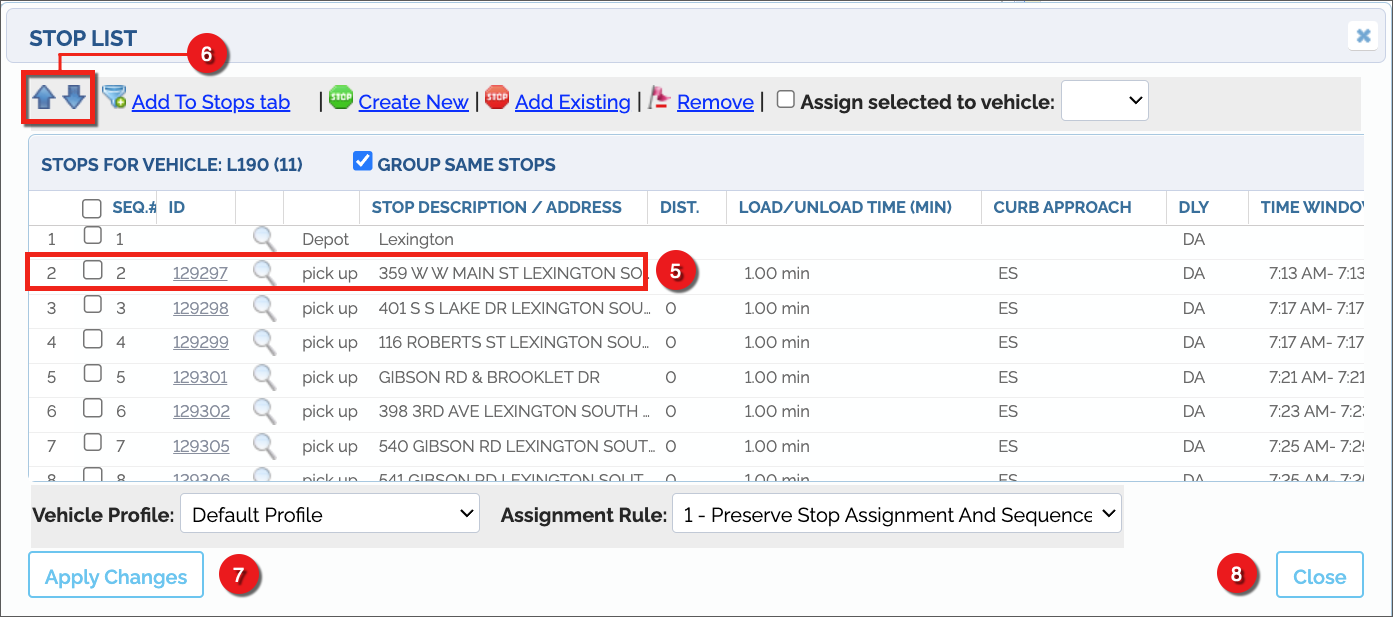
- Select the Stop you want to change by clicking its corresponding box.
- Click the Up or Down arrow button on the upper left corner or the window to move the Stop to the preferred position in the list. By doing so, you will establish the appropriate Stop sequence.
- Click the Apply Changes button.
- Click Close.
B. If you need to find an existing Run to edit its sequence
- Click on the Runs tab.
- Enter the Run#/Name on the upper right group of search filters. You can always use the other filters, such as Schools or Depots, to search for the Run.
- Click Find.
- Select the appropriate Run.
These are the same steps explained in the Viewing a Run section above. Once the Run is selected, repeat steps 2-8 explained for the first situation, when the system has just solved the Run and you are still in the Results menu (A).
Reviewing Results in the Map
Finally, to have a better overall understanding of these workflows, let’s take a look at the Map and see how the resulting changes are displayed:
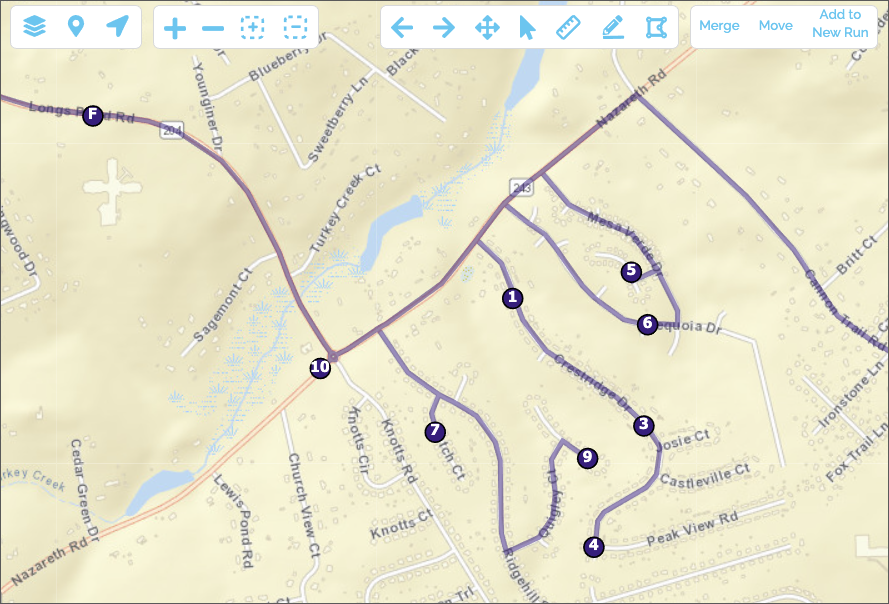
This generated Run (colored in red) shows the following sequence:
- The bus leaves the Depot (P) to pick up a Student at Stop #2 first, (which is farther than Stop #3).
- Then, it returns to Stop #3 and continues to Stop #4 to finally reach the School (F).

A newly modified Run (colored in blue) shows a different sequence:
- The bus leaves the Depot (P) to pick up the Student that lives closer at Stop #2 (previously #3) following a different path.
- Then, it proceeds to pick up the rest of them at Stops 3 and 4 before reaching the School (F).
