TOC
CH1: User Admin
CH2: Automatic Vehicle Location
Adding an AVL Account
Before you can use the AVL module, you’ll need to set up AVL for your vehicles in Compass Administration. To do this, you’ll need to:
- Go to Compass Admin > AVL Accounts and click New.
- Enter details of your AVL account:
-
- Account Name: enter any name to easily identify the AVL account. Typically the name is the GPS provider (i.e. Zonar).
- AVL Data Source: pick your GPS provider from the list.
AVL Account URL: enter the web address given by your GPS provider here. - AVL Login/Password: enter the credentials given by your GPS provider.
- Click Save to add the new AVL account, then close Compass Admin and return to Compass Route Builder

NOTE: Zonar Data Source
If using Zonar as a Data Source, an extra Device ID Field option appears. Consult with your GPS provider (Zonar) as to whether you’re using fleet or exsid, and select from the list.

Linking AVL Account to Vehicle
Back in Compass Route Builder, you’ll need to link the AVL Account you created to the vehicles in Compass. To do this:
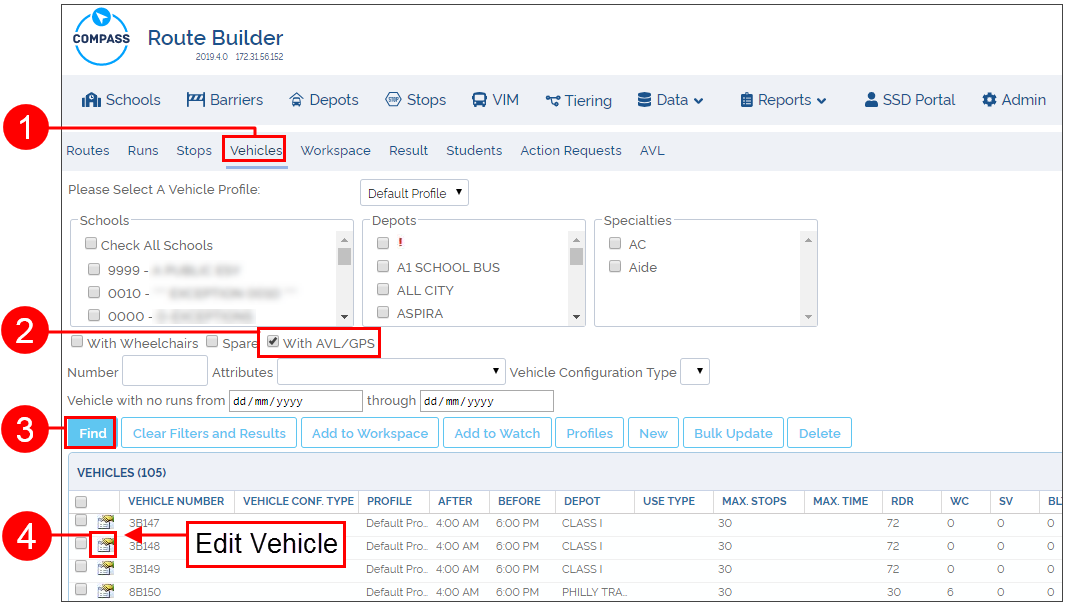
- Go to the Vehicles tab.
- Select With AVL/GPS.
- To find all vehicles that have AVL/GPS installed, click on the Find button.
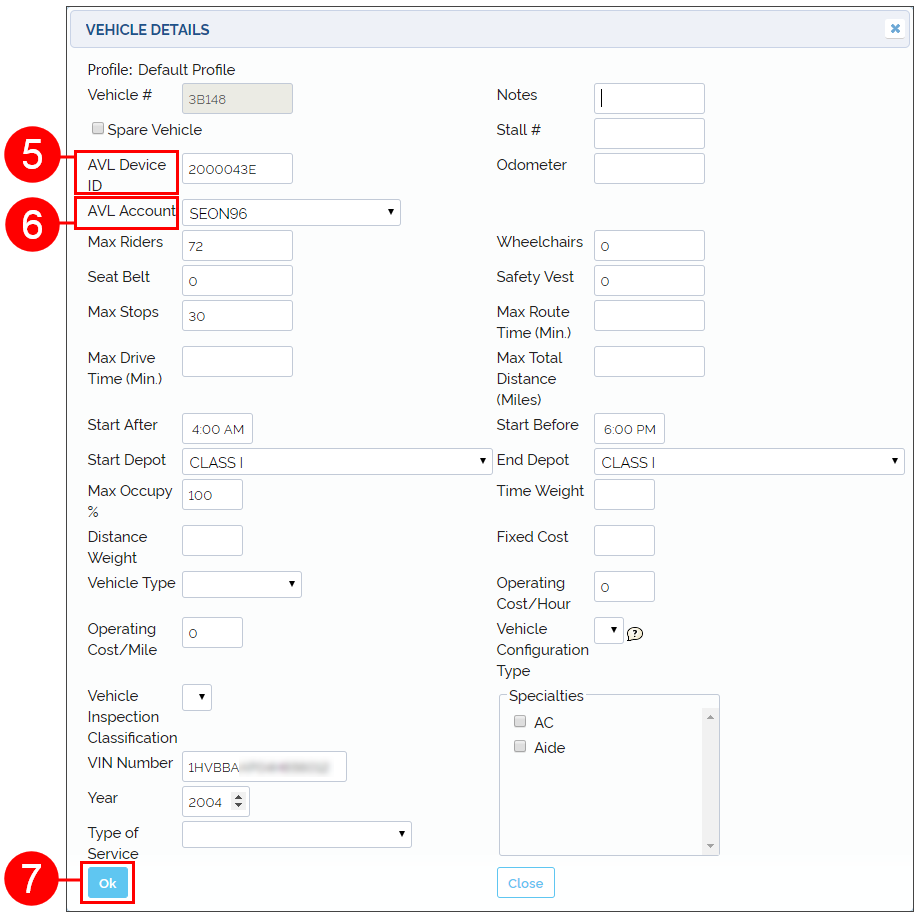
- Click the Edit Vehicle icon to open the Vehicle Details window.
- In the AVL Device ID field, enter the device ID of your GPS unit. This needs to match the Device ID of the unit in your AVL provider’s website. Refer to your AVL provider for more information.
- In the AVL Account field, select the AVL Account you created in Compass Admin.
- Click OK to associate AVL to this vehicle. Repeat this process for all vehicles that have GPS installed.