CMPS Admin Users 01
Creating and Editing Users
TOC
CH1: User Admin
CH2: Automatic Vehicle Location
The Admin Module allows customers to create and edit Compass Users, as well as to give Users permission to access different sets of features by assigning them User Roles. Customers can also edit existing Roles.
Similarly, the Report Profiles menu can be used to grant Users access to certain types of Reports within the Admin Module, and customers can easily edit previously created Report Profiles too.
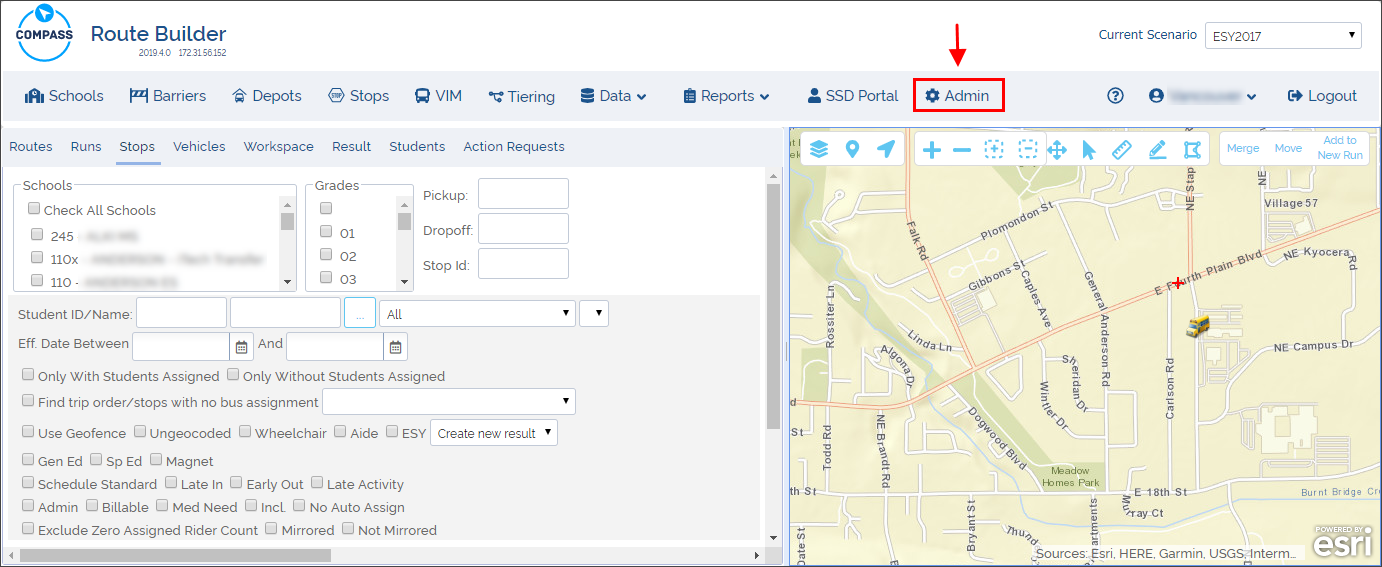
To access the Admin Module, log in to vMax Compass Route Builder and click on the Admin tab. The Admin Module will be displayed.
Creating a New User
When you click on the Users tab, a table listing the existing users is displayed. This table shows all the User Names and their corresponding Full Names and Status (Active or Non-Active). Users can be set as Active or Non-Active but they can’t be deleted from the system once they have been created.
Existing Users can be edited but you can also create New users. To create a New User:
- Click on the Users tab.
- Click on the New button.

The Account Information section is displayed first by default. Once there:
- Input Personal Data such as Username, Employee ID, First and Last Name and Email in the corresponding text boxes.
- Create a Password. Notice that Passwords must have, at least, one non letter or digit character and, at least, one digit (‘0’-’9’) and, at least, one uppercase (‘A’-’Z’). Once created, proceed to confirm right below.
- Select the Authentication Mode for the New User.
These Modes can be different depending on the customer. For Compass Cloud customers, you’ll need to choose COMPASS from the drop-down menu.
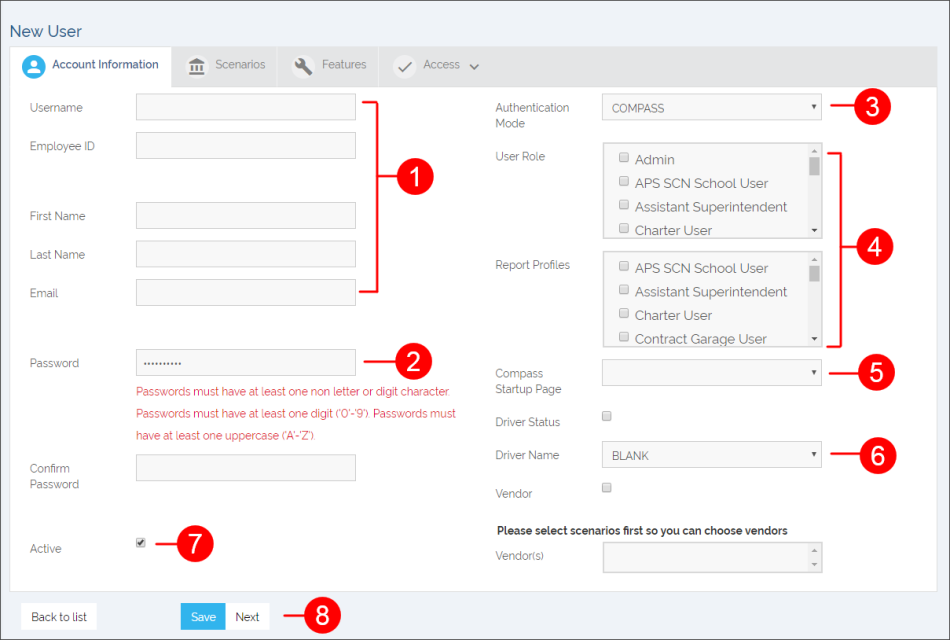
- Select the User Role and the Report Profiles assigned to the New User.
- Select the preferred Compass Start-Up Page.
- If the user is to have Driver Status check the corresponding box. Otherwise, assign a driver from the Driver Name drop-down menu.
- Check the Active box close to the bottom of the screen.
- Click Save and then Next to move on to Scenarios.
NOTE: Access with Mobile Data Terminal
Users with Driver Status can only access Compass through a Mobile Data Terminal (MDT) such as vMax Navigator.
Once the Account information has been completed:
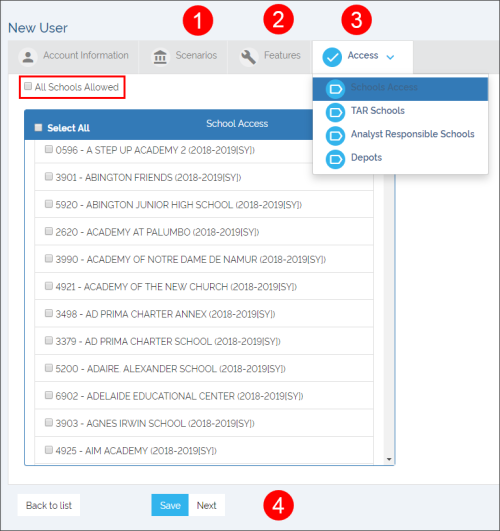
- Scroll down the Scenarios list and select the preferred Scenarios to be assigned to the User by checking the corresponding boxes. Notice that an Admin user can assign any combination of scenarios to a User Profile. Click Next at the bottom of the screen and move on to Features.
- Scroll down the Features list and select the preferred Features to be enabled for the User by checking the corresponding boxes.
Click Next at the bottom of the screen and move on to Access. - In the Access section click the Access tab to display a list of available Schools in different categories (Schools Access, TAR Schools and Analyst Responsible Schools) and a list of Depots. By default, all available Schools in each category and all Depots are selected. If necessary, deselect this option to view the complete lists and select Schools and Depots as required.
- Click Save.
Editing Existing Users
Within the Users menu, customers can find existing users and edit their information and those permissions assigned to them, such as User Roles, Report Profiles, etc. To edit an Existing User:
- Enter User Name in the text box. A list with matching Users appears.
- Select the right User and click on the magnifier. You will see a table displaying the User Name, Full Name and activity status (Active or Non-Active).
- To edit the information, click on the Edit button.

- If necessary, enter new Personal Data such as Username, Employee ID, First and Last Name and Email in the corresponding fields.
- Edit the Authentication Mode for the User if required. Remember that these Modes always depend on the customer type. For Compass Cloud customers, you’ll need to select COMPASS from the drop-down menu.
- Set User as Active or Non-Active by checking the corresponding box. Remember they can’t be deleted once they have been created.
- Select or deselect User Roles and Report Profiles assigned to the User.
- Select the preferred Compass Start-Up Page.
- If the user is to have Driver Status check the corresponding box. Otherwise, assign a driver from the Driver Name drop-down menu.
- Click Save and then Next.
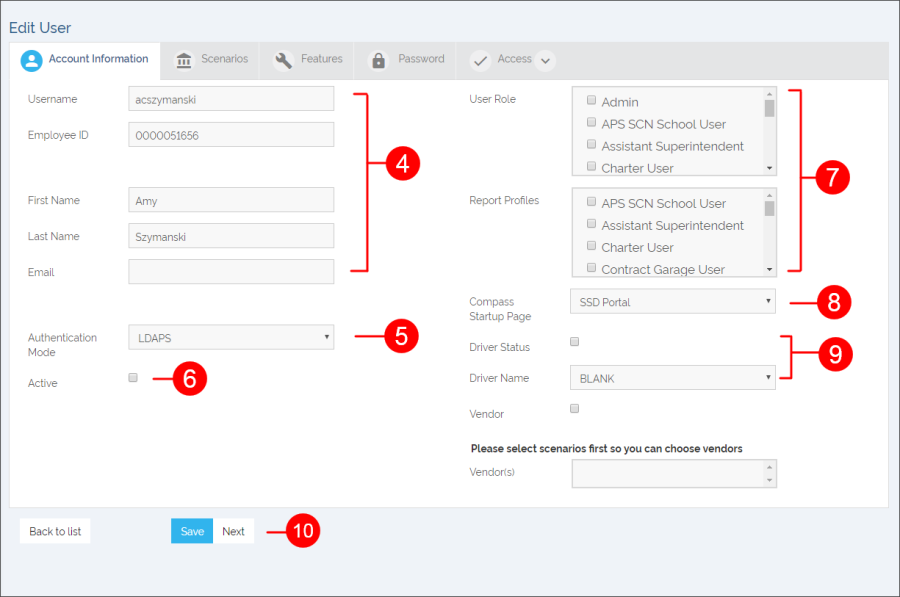
Once the Account Information has been edited, proceed to the other menus and complete the process as necessary.
The steps are very similar to those already explained in the previous Creating a New User section.
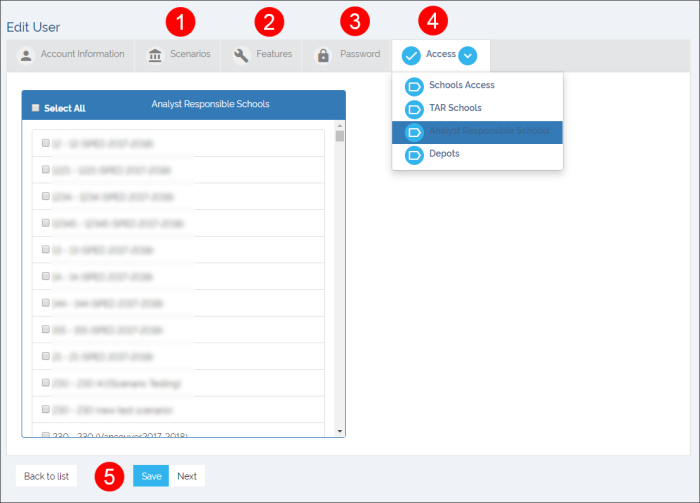
By clicking Next in the Account Information dialog, the Scenarios menu will be disclosed.
- In the Scenarios dialog, Scroll down the list, check those Scenarios that need to be updated and enter the new information. Click Next to move on to Features.
- Scroll down the Features list. If needed, update the Features that have to be enabled for the user.
Click Next to move on to Password. - Change the Password if required. Remember that Passwords must have, at least, one non letter or digit character and, at least, one digit (‘0’-’9’) and, at least, one uppercase (‘A’-’Z’).
Click Next and move on to Access. - The Access drop-down menu shows different School categories and a Depot list. School categories are: School Access, TAR Schools and Analyst Responsible Schools. Edit the preferred School and Depot selections as required. To view the complete lists of Schools and Depots make sure the option “All Allowed” is unchecked.
- Click Save.
