TOC
CH1: User Admin
CH2: Automatic Vehicle Location
The Admin Module allows customers to give users permission to access different sets of features by assigning them User Roles. Customers can also edit existing Roles.
If you have read the previous tutorial, Creating and Editing Users in Admin Module, you already know that, in order to access the Admin Module, you need to log in to Compass first and then click on the Admin button.
Creating New User Roles
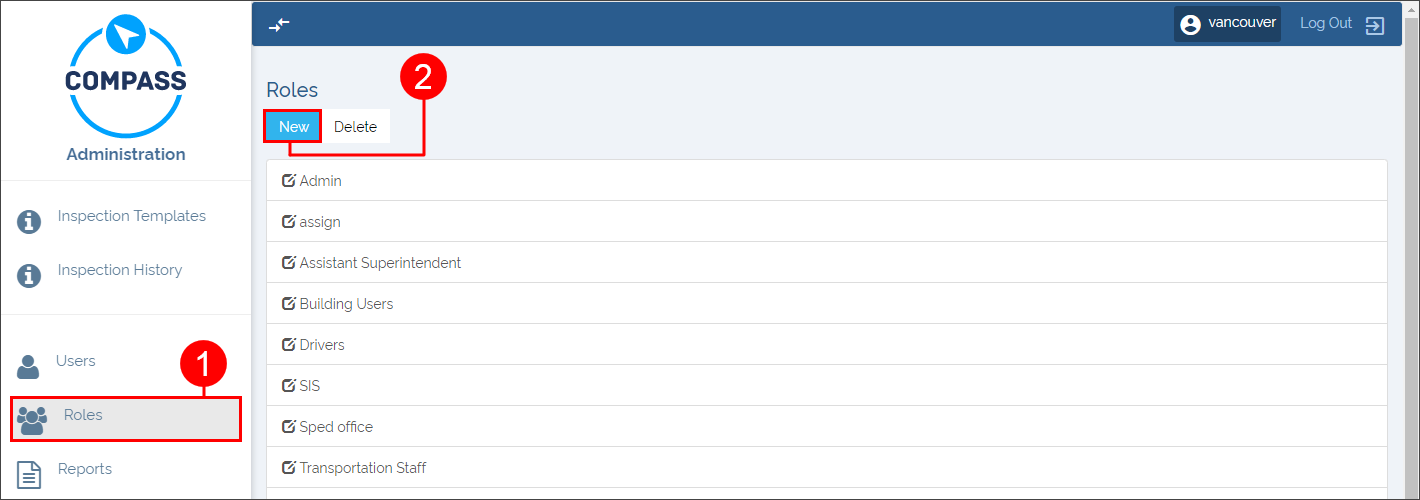
The Admin Module shows the Roles menu on the left of the screen. The Roles menu is a tool to create, edit or delete those Roles that can be assigned to users. Existing User Roles become visible once you access this menu.
To create a New Role:
- Click on the Roles tab on the left of your screen. The new menu appears.
- Click the New button. A new window showing the features that can be included in a Role is displayed below.
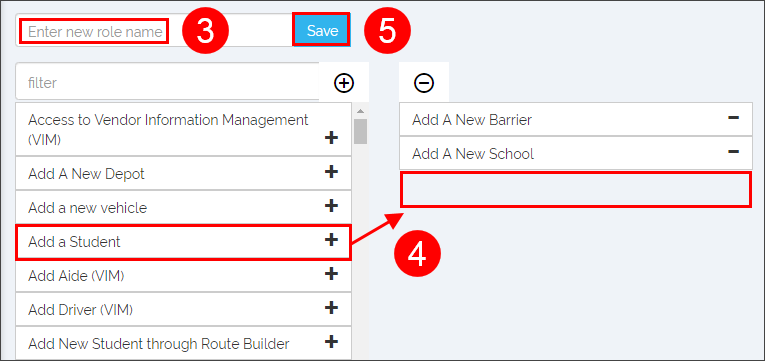
- Enter a new Role Name in the corresponding text box.
- Add those features to which the user will have access by clicking on them. The selected features will move to the right column. You can always deselect permissions by clicking the features back to the left column.
- Click on the Save button.
Editing Existing User Roles
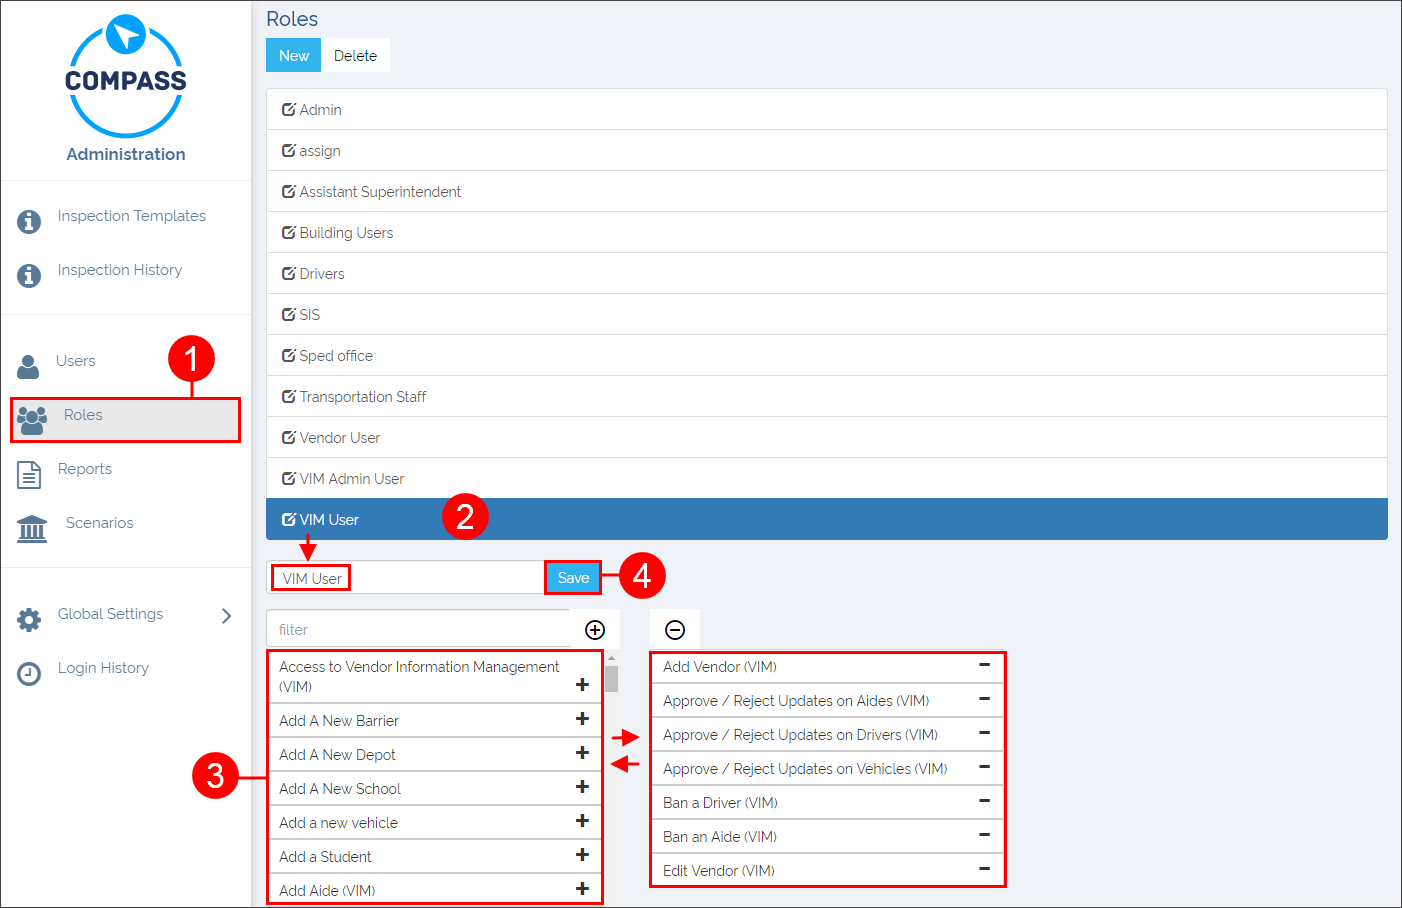
Existing User Roles are easily edited in the Roles menu. Features to which users have access can be added or removed with a simple click. To Edit an Existing Role:
- Click on the Roles tab on the left of your screen. The new menu appears.
- Find the Role you want to edit in the list and click on it to select it. A new window showing the permitted (right column) and non-permitted (left column) features is displayed below.
- Add features to the Role by clicking on them in the left column. The selected features will move to the right column.
Remove features by clicking on them in the right column. The selected features will move to the left column being removed from the Role’s permissions. - Click on the Save button.