Issue:
How can I connect a laptop to the DVR for configuration or troubleshooting?
Description:
A windows laptop can be connected to a Safe Fleet DVR for configuring, troubleshooting or retrieving the video and log files from the unit.
Solution
Step 1: Configure your laptop
Configure your laptop to obtain an IP address automatically using Dynamic Host Configuration Protocol (DHCP). If your laptop is not configured to DHCP, please verify the following settings before continuing to Step 2:
-
On your Windows 10 laptop, right-click Start button, then navigate through Network Connections > Network and Sharing Center > Local Area Connection.
-
In the Local Area Connection Status window, click Properties. The Local Area Connection Properties window will appear.
-
Click to highlight the current Internet Protocol Version, and then click Properties. The Internet Protocol Version Properties window will appear.
-
Select Obtain an IP Address Automatically.
Step 2: To connect the DVR to the laptop
-
Connect one end of an Ethernet cable to a network port on the laptop, then connect the other end of the cable to a network port on the Safe Fleet DVR.
-
The laptop uses Automatic Private IP Addressing, (APIPA) to select an IP address and this process may take up to 90 seconds.
-
Once connected, the laptop Local Area Connection should report “limited connectivity” using an Automatic Private IP Address. Confirm by opening your network connections.
Note: In very rare instances, the laptop may select the same IP address (http://169.254.1.1) used by the DVR and cause a conflict. If this is the case, manually set the laptop IP address to http://169.254.1.2 or http://192.168.0.99 (new recorders).
-
Open Microsoft Edge browser with IE mode enabled. Click here for instructions on how to use Edge browser.
-
Type in DVR’s default IP address: http://169.254.1.1 (http://192.168.0.100 for newer DVR types).
-
Press Enter and the Login screen will open.
-
At the login prompt, enter the following credentials to access the internet browser user interface. Note: user name is case sensitive.
Default User name: Admin
Default Password: 11111111 -
Click OK or press Enter on the keyboard to display the vMax Web interface live view screen.
If any issues arise:
-
Ensure that you are using Microsoft Edge with IE mode enabled or Internet Explorer browser.
-
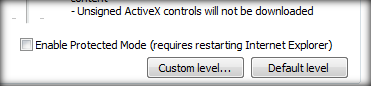
Navigate to Internet Explorer browser’s “Internet Options”, then “Security” settings. There:
a. Ensure that “Enable Protected Mode” is not checked
-
b. Click “Custom level” (see screen capture above) and scroll down to the “Active X controls & plug-ins”. There, make sure that the following settings are selected:
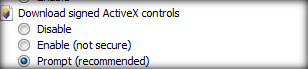
“Prompt” for the “Download signed ActiveX controls” setting
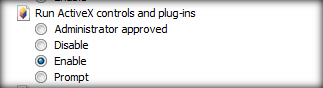
c. “Enable” for the “Run ActiveX controls and plug-ins” setting